



Best Cleaning Checklist for Move Out Inspections
A move-out inspection can come down to the details most people notice only after the truck is loaded: the grease behind the range, the dust on a ceiling fan, or the pet odor trapped in carpet. This best cleaning checklist for move out helps renters, homeowners, landlords, and property managers work through the job in the right order, without wasting a full day re-cleaning areas that got dirty again.
Start with an empty space whenever possible. Cleaning around boxes and furniture takes longer, hides problems, and makes it harder to see what still needs attention. Keep your lease, move-out instructions, and photos from your original walk-through nearby. A landlord may have specific expectations for appliances, blinds, or carpet condition, and those requirements should guide your final pass.
Prepare Before You Start Cleaning
Do not wait until the final evening to find out the oven needs more than a quick wipe. Two or three days before move-out, walk room by room with your phone and take clear photos of any existing wear, nail holes, stains, damaged blinds, or chipped paint. This is useful documentation, especially if a question comes up about your security deposit.
Gather the basics: microfiber cloths, a vacuum with attachments, a mop, bucket, scrub brush, non-abrasive sponge, glass cleaner, all-purpose cleaner, bathroom cleaner, degreaser, trash bags, and a step stool. Choose products that are appropriate for the surface. Harsh abrasives can scratch glass cooktops, stainless steel, fixtures, and some tile finishes. If children or pets are still in the home, use products safely and keep the rooms ventilated.
Cleaning from top to bottom and from the back of the home toward the exit saves time. Dust falls, crumbs travel, and vacuuming too early often means doing it twice. Finish one room completely before moving to the next when possible.
Best Cleaning Checklist for Move Out: Every Room
Most move-out cleanings share the same foundation. Once the room is empty, work through these items before focusing on room-specific tasks:
Remove all trash, belongings, nails, hooks, tape, and adhesive residue.
Dust ceiling fans, vents, light fixtures, wall corners, baseboards, doors, and window sills.
Wipe switch plates, door handles, cabinet fronts, closet shelves, and interior doors.
Clean windows and mirrors, then vacuum or sweep edges before cleaning the floor.
Check for scuffs, cobwebs, marks, or forgotten items during a final walk around the room.
Do not overlook closets. Empty closets should be vacuumed or swept, wiped down on shelves and rods, and checked for personal items in the top corners. A closet that looks clean at first glance often holds dust, pet hair, and leftover hangers.
Kitchen Cleaning Checklist
The kitchen usually takes the most time because residue builds up in places that are easy to ignore during normal weekly cleaning. Begin with the refrigerator after it has been emptied and unplugged if required by the property owner. Wipe shelves, drawers, door seals, and the exterior, including the top and the floor underneath. Leave the door slightly open if the refrigerator will remain unplugged to help prevent mildew odors.
Clean the oven according to its manufacturer instructions. Remove racks and soak or scrub them as needed. Degrease the cooktop, burner grates, control knobs, backsplash, hood, and the area along the sides of the range. Pull the appliance out carefully only if it is safe to do so. Crumbs, grease, and spills behind the stove are common inspection issues.
Finish by wiping cabinets and drawers inside and out, sanitizing the sink, polishing the faucet, cleaning the dishwasher filter if accessible, and wiping counters. Look under the sink for drips, cleaning supplies, or trash. Sweep and mop last, paying close attention to the floor edges and toe kicks.
Bathroom Cleaning Checklist
Bathrooms need more than a fast spray-and-wipe. Let your cleaner sit on soap scum, hard-water marks, and toilet bowl buildup for the product’s recommended time before scrubbing. This does more of the work for you and helps avoid aggressive scrubbing that can damage surfaces.
Clean the shower or tub, shower doors or curtain rod, tile walls, grout lines, vanity, sink, mirror, faucet, toilet exterior, toilet base, and floor. Wipe inside medicine cabinets, drawers, and under the vanity. Hair collects around drains, along baseboards, and behind toilets, so use a vacuum attachment or a damp cloth in those tight areas.
If grout is stained or shower caulk is discolored, determine whether it is surface buildup or permanent wear before attempting a strong cleaner. A tenant is typically responsible for normal cleaning, but not always for aging materials or maintenance issues. Take photos if you see cracked tile, failing caulk, or a leak.
Bedrooms, Living Areas, and Entryways
In living rooms and bedrooms, start high with fans, vents, and blinds. Dust blinds individually rather than simply opening and closing them. Wipe window sills and tracks, especially if the home has been open during pollen season or a dusty Minnesota summer.
Use a slightly damp microfiber cloth on walls to remove light scuffs. Test a hidden area first, since flat paint can show marks if it gets too wet. Patch small nail holes only when your lease allows it or when you can match the existing finish. A poorly matched patch can be more noticeable than a small, clean hole.
At the entry, clean the door, threshold, light switch, trim, and any glass. This is often the first area an inspector sees. A clean entry sets the right impression, but it should not distract from missed work in the kitchen or bathroom.
Give Floors and Carpets Special Attention
Floors show the total impact of a move. Vacuum hard floors before mopping so grit does not get pushed into corners. Use the right cleaner for the material. Excess water can damage laminate, wood, and some vinyl flooring, while strong acidic products may dull natural stone or certain grout.
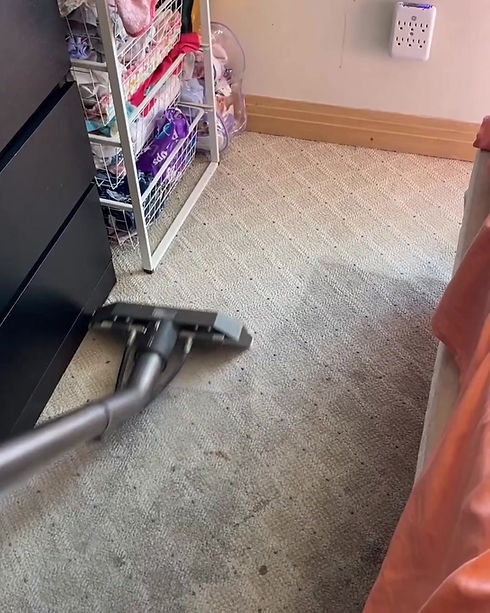
For carpet, vacuum slowly in multiple directions, including closet floors, edges, stairs, and under any furniture that remains. Treat spots carefully and avoid soaking the backing. Store-bought spot removers can lighten carpet or leave a sticky residue that attracts new soil if they are overused.
Professional carpet cleaning may be the better choice when there are pet odors, visible traffic lanes, old stains, or a lease requirement for a cleaning receipt. Deep extraction removes embedded soil that vacuuming cannot reach, and fast-drying methods are especially helpful when your move-out timeline is tight. For renters and property managers around Braham, Ebert’s Carpet Cleaning can provide a practical option for move-out carpet cleaning with pet-safe products, upfront pricing, and a satisfaction guarantee.
Do Not Forget Outdoor and Utility Areas
Whether these areas are your responsibility depends on the lease, but they are worth checking. Remove personal items from patios, balconies, garages, storage units, and sheds. Sweep the garage floor, pick up pet waste from the yard if applicable, and make sure trash and recycling are handled according to local pickup rules.
Check the washer and dryer if they are included with the property. Wipe the machines inside and out, clean the lint trap, and remove detergent containers from nearby shelves. In a utility room, look for cobwebs, dust along pipes, and items left on top of the water heater or furnace area.
Make a Final Inspection Pass
After cleaning, walk through the home with the lights on and your phone camera ready. Open every cabinet, drawer, closet, appliance, and blind. Flush toilets, run faucets briefly, and check that no cleaning cloths or tools are left behind. Take final photos and videos of each room, including floors, appliances, and any pre-existing damage.
Return keys, garage remotes, mailbox keys, parking passes, and access cards exactly as instructed. If something cannot be completed before your deadline, communicate with the landlord or property manager early rather than hoping it goes unnoticed.
A careful move-out clean is not about making an older home look brand new. It is about leaving the property clean, empty, documented, and ready for the next person - while giving yourself the strongest possible position when it is time for your deposit to be returned.


Comments